Table of Contents
Pageview and video events are powerful features of AWtomator that let you move, copy, tag, start or end AWeber workflows whenever they visit a certain page (or pages) on your website, or watch a certain portion of your videos.
However, these events rely on AWtomator being able to identify the subscriber currently visiting the page.
AWtomator remembers previously identified subscribers by cookie or ip address, so the trick is to let it know about new subscribers, as well as periodically remind it (as cookies can be cleared / ip addresses can change).
There are a number of ways you can feed this information to AWtomator:
1) Use AWtomator Link Events
AWtomator link events are special links that contain an AWeber variable: {!email}
https://www.awtomator.com/c/abc123?e={!email}
When you use a link event as the link in your emails, AWeber will automatically replace {!email} with the subscriber’s email address, and AWtomator will know which subscriber clicked the link.
If you periodically use link events in your followup sequence or regular broadcasts, then subscribers will identify themselves to AWtomator that way.
We also recommend you use link events for important links, such as those that lead to a funnel, video or Call To Action (CTA).
For example, if you send the subscriber to a video landing page from an AWeber email using a link event, you can reliably use a video event to trigger a CTA etc.
The added advantage of using an AWtomator Link event is you can perform all AWtomator actions – for example, tagging the subscriber, moving them to a new list, or increasing their lead score.
2) Set a Javascript variable
If you already know the email address of the person on the page (e.g. they are logged in) then you can set a global Javascript variable called awt_email and place it before the page / video event code snippet on your page.
For example:
<script>window.awt_email='[email protected]'</script>
If there isn’t an awt_email variable, AWtomator will then look at the web page URL to see if there is an email set in one of the query parameters.
3) Use a URL parameter
Many funnels pass form data to the landing page automatically when they redirect the user from the lead capture form to the content.
For example:
https://www.yoursite.com/page/[email protected]
AWtomator will check the web page URL to see if there is an email set using the “awt_email”, “email”, or “e” query parameters, in that order.
If it can’t find one of those, it will check every other query parameter for a valid email, and use the first one it finds.
AWeber has an option to pass form data to the thank you page in both it’s confirmed opt-in (List Settings) and Signup Forms.
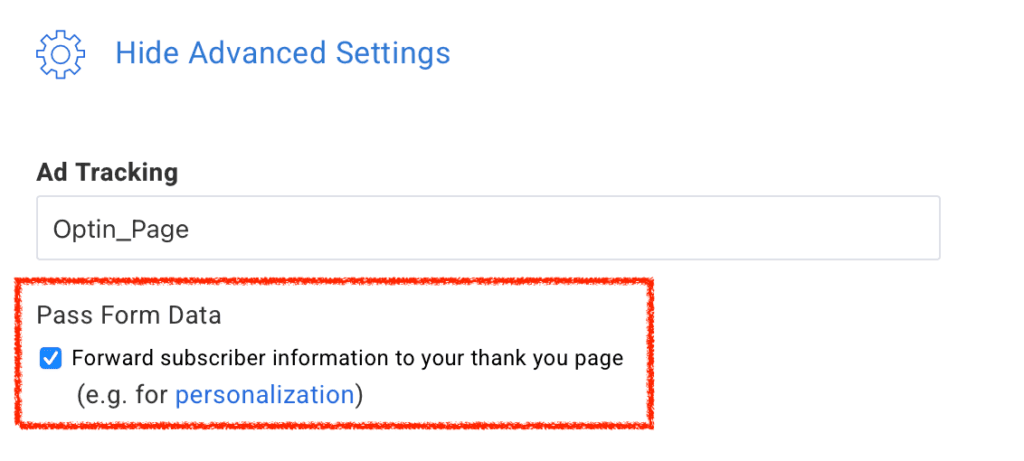
If you use this option, AWtomator will use the email parameter that AWeber passes to identify the subscriber.
You just need to include an AWtomator page or video event on the landing page that AWeber passes the form data to.
Warning: There is a “gotcha” with AWeber’s form passing!
If your landing / thank you page is on WordPress, and you are collecting subscriber name in your opt-in form, then you will likely get a 404 not found instead of the landing page.
This is because AWeber passes a name parameter for the subscriber name, and this is a protected/reserved parameter in WordPress!
The solution is either, a) don’t collect first name in your opt-in forms or b) use the hidden link event option below!
If your landing pages are in WordPress and you collect subscriber name in your opt-in forms, or you don’t want to pass form data as a URL parameter for other reasons, then you can use a “hidden” AWtomator Link Event as an invisible redirect to the landing page, right after opt-in.
This identifies the subscriber as soon as they opt-in, so you don’t have to wait for them to use one of your other link events.
Setup is slightly different, depending on whether your list is Double Opt-in or Single Opt-in, so here’s a step by step guide to setting this up for both.
Double Opt-in (aka Confirmed Opt-in) Lists
With double opt-in lists (the default option in AWeber), your subscribers have to click a link in a confirmation email before being added to the list. So, for these people, we need to set our link event as the Confirmed Opt-in Success Page URL,
Step 1: Get your list’s current Success Page URL
In your AWeber account, select your list and then choose List Options > List Settings and click on the Confirmed Opt-in tab.
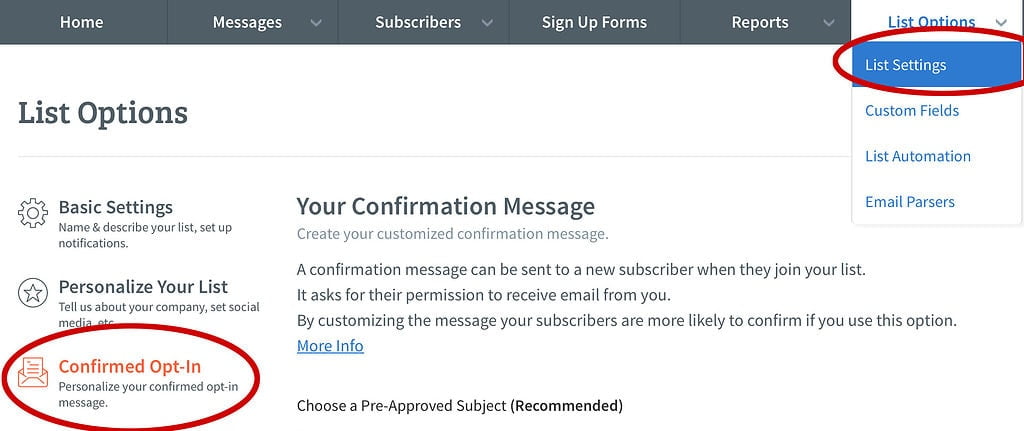
Scroll down and take a look at Item 3, the Success Page URL.
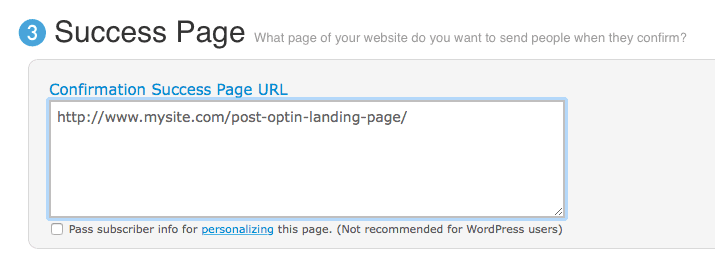
We’ll be replacing this with an AWtomator Link Event, so copy the current URL as we’ll be using it in a moment.
Step 2: Create a New Link Event
Now, create a new link event in AWtomator. Set the Success Page URL above as the Link Destination URL.
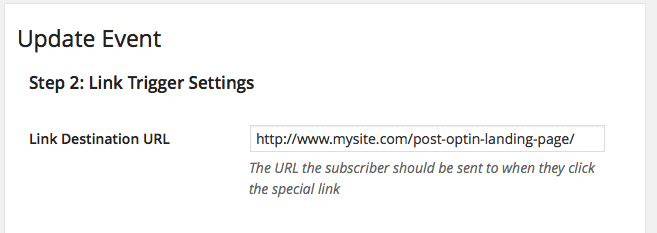
Set the action to “Tag the subscriber only” and leave the tags section blank (unless you want to tag new subscribers for some reason, of course – it’s just optional in this case).
Make sure that you activate your link event once you’ve created it.
Step 3: Set the Link Event URL as Your Success Page URL
Finally, all you have to do is to set your link event URL as your Success Page URL, tick the “Pass subscriber info for personalizing this page” checkbox and save your list settings.
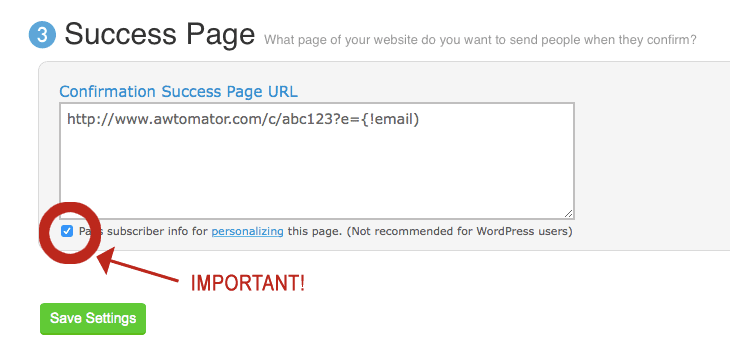
IMPORTANT: Even though AWeber warns that the “Pass subscriber info for personalizing this page” option is not recommended for WordPress users, it is safe to use with an AWtomator link event, and is required for the link to work.
Now, every time a subscriber opts in, they will be routed to your success page via your AWtomator Link Event, and this will identify your subscriber to AWtomator. Now, your subscriber will automatically trigger any pageview events without needing to click any other link events.
Do a test signup to check everything is working ok. Common problems are:
• Link not active error:
Check you activated your Link Event in step 2
• Email address not provided:
Check you ticked that “Pass subscriber info for personalizing this page” checkbox in step 3
Single Opt-in Lists
With single opt-in lists, your subscribers are added as soon as they enter their details, and the “Confirmed Opt-in” settings are ignored. So, for these people, we need to set our link event as the Thanks Page URL in the signup form.
Step 1: Get your signup form’s current Thanks Page URL
In your AWeber account, Edit your signup form and then choose the Settings tab.
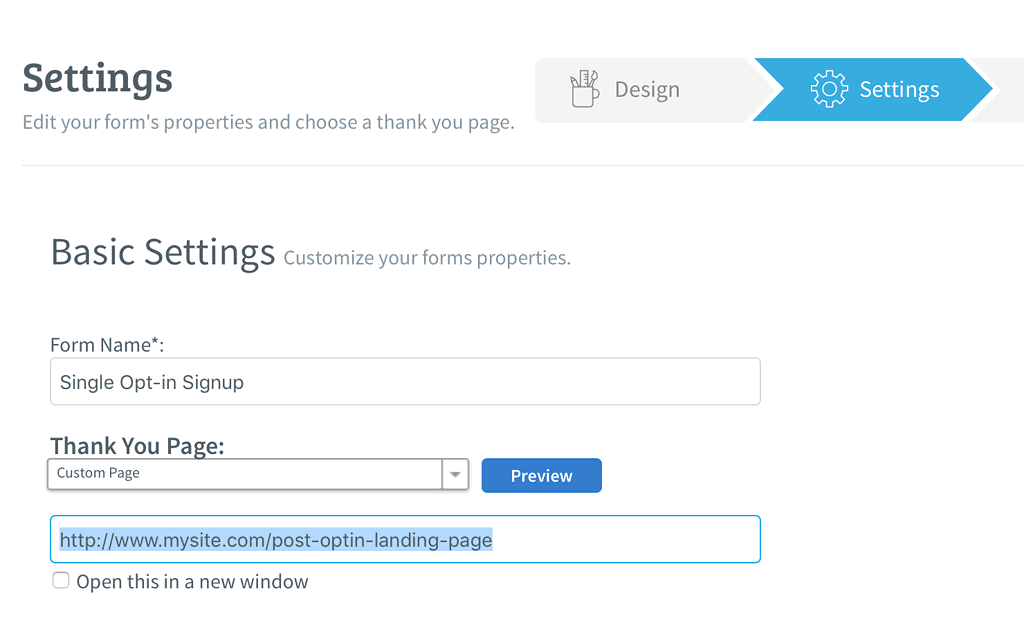
Scroll down and take a look at the Thank You Page URL.
We’ll be replacing this with an AWtomator Link Event, so copy the current URL as we’ll be using it in a moment.
Step 2: Create a New Link Event
Now, create a new link event in AWtomator. Set the signup form Thank You Page URL above as the Link Destination URL.

Set the action to “Tag the subscriber only” and leave the tags section blank (unless you want to tag new subscribers for some reason, of course – it’s just optional in this case).
Make sure that you activate your link event once you’ve created it.
Step 3: Set the Link Event URL as Your Thank You Page URL
Finally, all you have to do is to set your link event URL as your Thank You Page URL, click to “Show Advanced Settings” and then tick the “Forward subscriber information to your thank you page” checkbox and save your list settings.
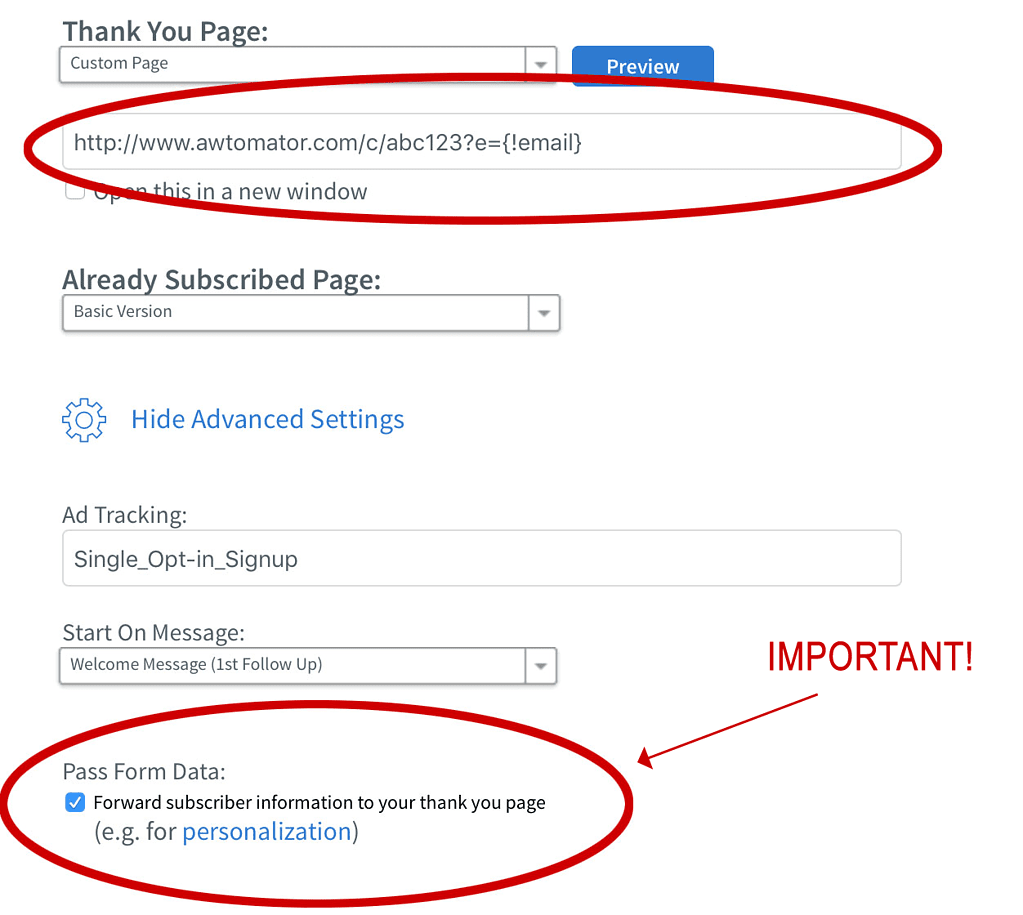
IMPORTANT: Even though AWeber warns that the “Forward subscriber information to your thank you page ” option is not recommended for WordPress users, it is safe to use with an AWtomator link event, and is required for the link to work.
Now, every time a subscriber opts in, they will be routed to your thank you page via your AWtomator Link Event, and this will identify your subscriber to AWtomator. Now, your subscriber will automatically trigger any pageview events without needing to click any other link events.
Do a test signup to check everything is working ok. Common problems are:
• Link not active error:
Check you activated your Link Event in step 2
• Email address not provided error:
Check you ticked the “Forward subscriber information to your thank you page “checkbox in step 3
Note: If you published your form manually, you’ll need to update the code. The “redirect” and “meta_forward_vars” hidden fields will change as a result of this tutorial.
