AWtomator now supports Stripe Webhook notifications, which means that if you sell products via Stripe, you can now automatically segment your AWeber subscribers when they buy your product – such as moving them to a buyers list.
AWtomator’s advanced Stripe AWeber integration lets you connect multiple Stripe accounts to your AWeber email marketing account.
Being able to contact buyers separately means you can send out targeted offers and “consumption content”, which can increase engagement with the product purchased and slash your refund rates.
What’s more, you can also use this to ADD new subscribers to your AWeber lists automatically, so you can build your buyers list on auto-pilot.
Here’s how to set it up…
Step 1: Setup a Stripe Integration in AWtomator
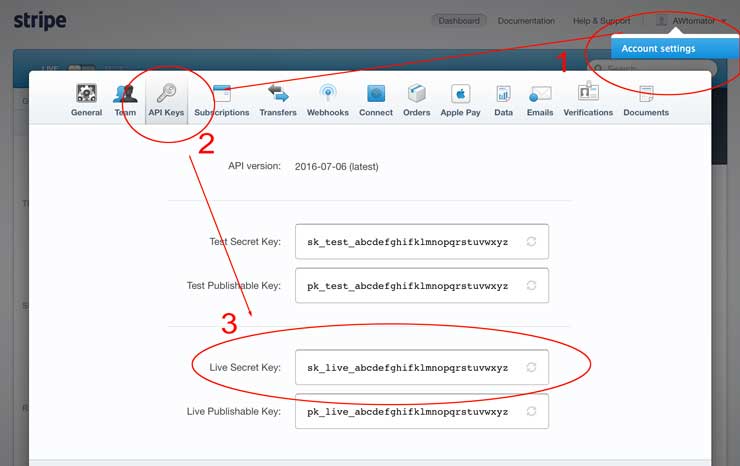
We need to get Stripe and AWtomator talking to each other, so the first thing we need to do is to login to our Stripe account and make a note of our Live Secret Key. This is under Account Settings > API Keys.
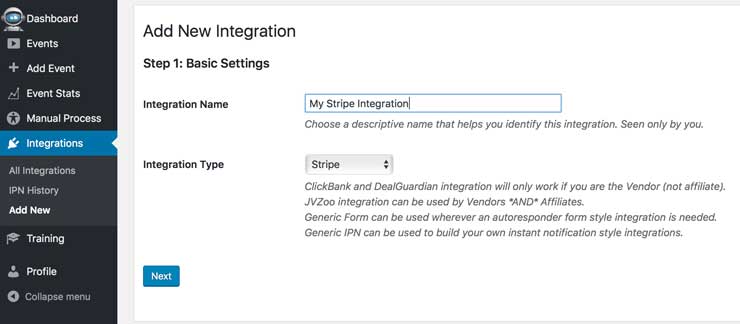
Now, we can hop over to AWtomator and create a new Integration, choosing Stripe as the Integration Type.
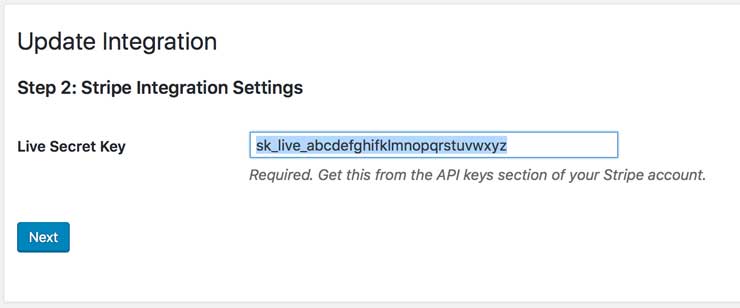
Next, we need to add the “Live Secret Key” we got from from Stripe.
Finally, we copy the Instant Notification URL ready for step 2:
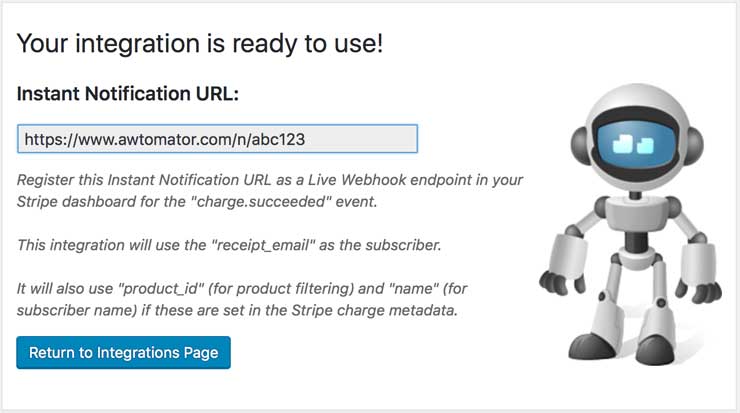
Step 2: Register the AWtomator Instant Notification URL in Stripe
Next, we need to tell Stripe to contact AWtomator via the Instant Notification URL whenever a sale of a product is made.
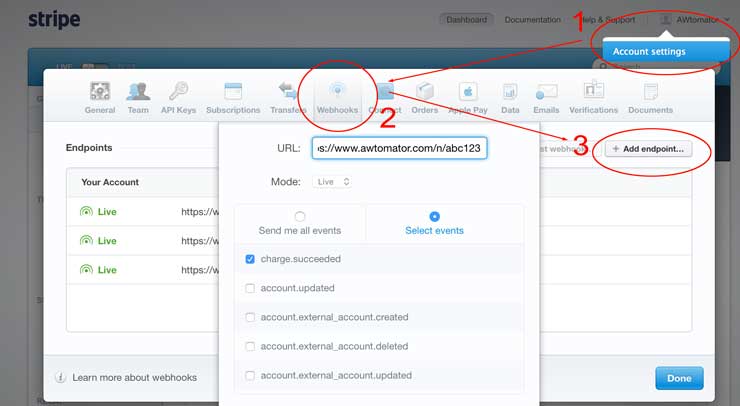
To do this, we simply login to Stripe and select the Account Settings > Webhooks menu and then click to Add endpoint.
We then add our Instant Notification URL, select “Live” as the Mode, and then select the charge.succeeded event.
TIP: If you have more than one Stripe account, then repeat steps one and two to create an integration for each Stripe account you wish to connect.
Step 3: Tell AWtomator what you want to do when a sale is made
With the integration side of things setup, AWtomator will now get a notification any time a sale is made in your Stripe account.
So now we need to tell AWtomator what to do when a notification comes in.
To do that, you simply use the “Add Event” option to set up an IPN Event in AWtomator, which is an event triggered by a notification.
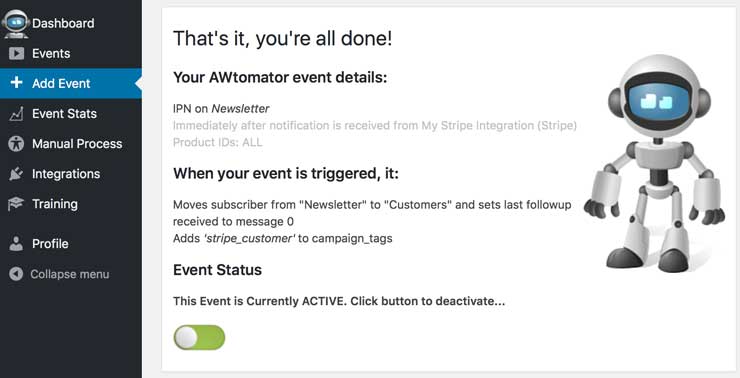
You can create as many IPN Events as you like for each integration, so we can create one to move existing subscribers from our prospect list…
… and another one to add brand new subscribers to our customer list automatically.
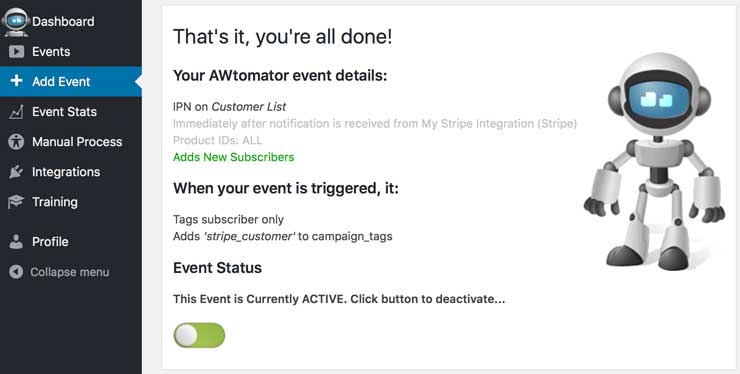
(If you do both, set a 2-3 minute delay on the IPN event that adds subscribers so that any moves can happen first.)
ADVANCED TIP:
Stripe doesn’t collect Customer Name or product information by default, but AWtomator will look in the Charge metadata field for “name” and/or “product_id” if you wish to include these as part of your order flow.
Including a product_id means you can set up multiple IPN events – all linked to your Stripe integration – and fire them selectively depending on the product ordered.
So, you could deliver a bonus “consumption” email sequence to buyers of one product, send upsell offers to buyers of another or just tag customers so you can broadcast to them in the future…
When adding new subscribers, AWtomator will also try to pass charge metadata items as AWeber custom fields, if they exist. So, for example, if you had an AWeber custom field called “affiliate_ref”, then you can set this via a charge metadata field of the same name.
How will you use this? Leave your comments and questions below!
If you use AWeber, why not take a free trial of AWtomator and try this out for yourself!

