If you use DealGuardian and AWeber, you know that you can add new subscribers to your list when they buy a product.
But wouldn’t it be great if you could automatically take an action when your existing AWeber subscribers buy something – such as moving them to a buyer list without any opt-in or confirmation emails, tagging them for broadcasts, or skipping to another part of your followup sequence…?
Well, if you sell products via DealGuardian, you’ll be pleased to hear that you can now set up an integration in AWtomator that lets you automatically segment subscribers when they buy your DealGuardian products – such as moving them to a buyers list.
Being able to contact buyers separately from prospects means you can send out targeted offers and “consumption content”, which can increase engagement with the product purchased and slash your refund rates.
And what’s more, you can move/copy buyers based on the product they have ordered, allowing you to cross-sell and promote offers based on specific product purchases.
Here’s how to set it up…
Step 1: Setup a DealGuardian Integration in AWtomator
We need to get DealGuardian and AWtomator talking to each other, so the first thing we need to do is to login to our AWtomator account and create an Integration Event, choosing DealGuardian as the Integration Type.
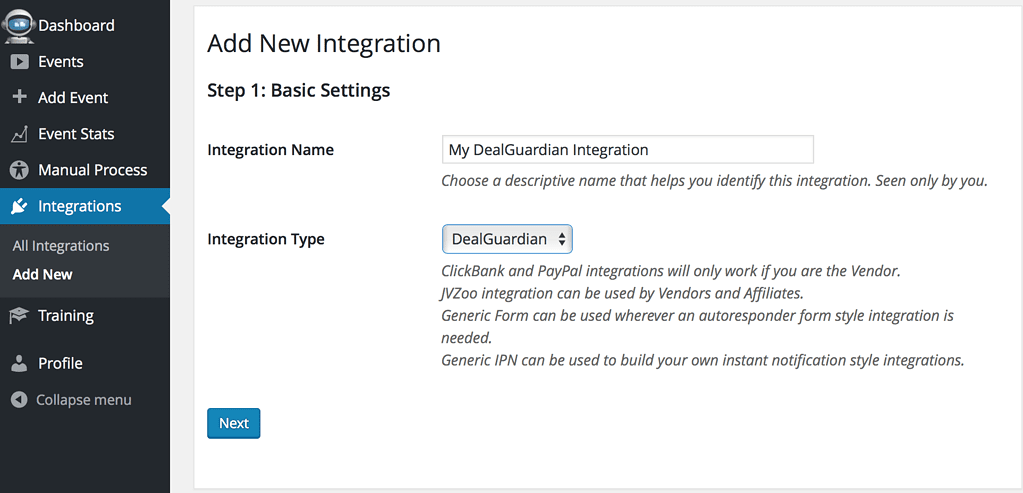
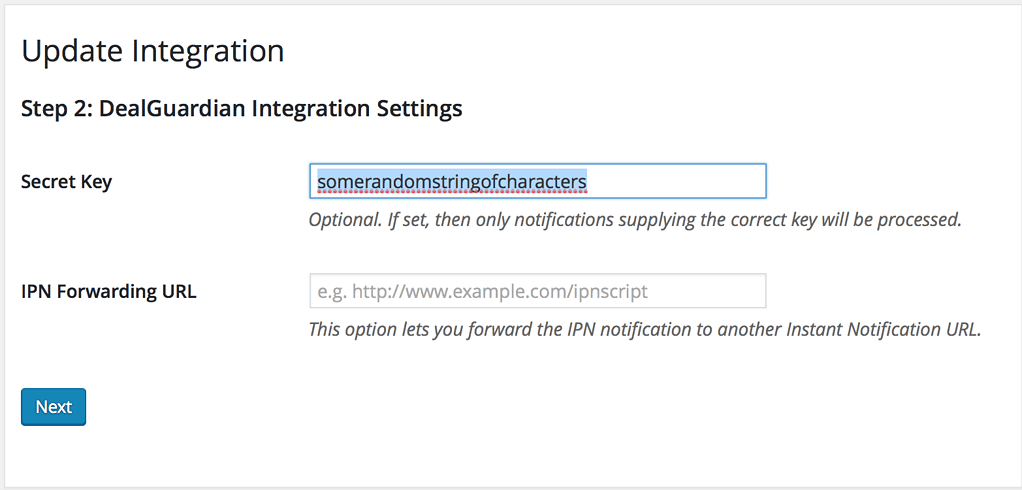
Now, we can optionally create a Secret Key to ensure that all messages really come from DealGuardian.
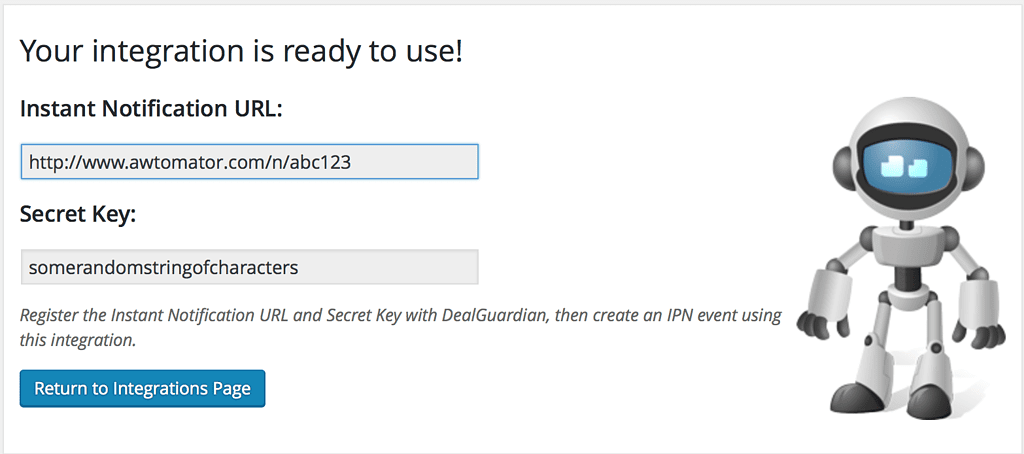
Finally, we copy the Instant Notification URL (and secret key) ready for step 2:
Step 2: Register the AWtomator Instant Notification URL in DealGuardian
Next, we need to tell DealGuardian to contact AWtomator via the Instant Notification URL whenever a sale of a product is made.
To do this, we simply login to DealGuardian and select the Add-Ons > Integrations menu and then click to Create new IPN Integration.
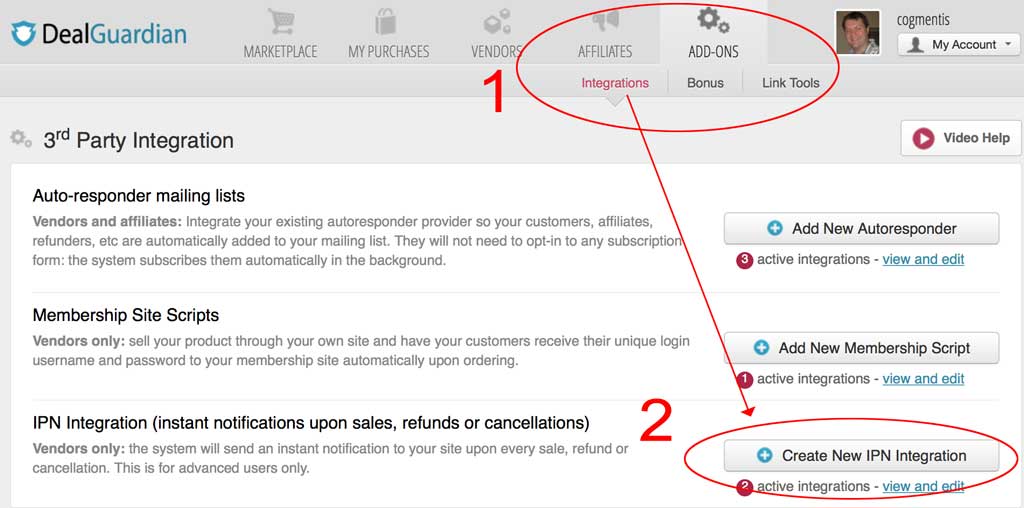
We then select “All Products” and set the AWtomator IPN Notification URL and Secret Key (if used) and then click the ‘Add new integration’ button to save.

Step 3: Tell AWtomator what you want to do when a sale is made
With the integration side of things setup, AWtomator will now get a notification any time a sale is made in your DealGuardian account.
So now we need to tell AWtomator what to do when a notification comes in.
To do that, you simply set up an IPN Event in AWtomator, which is an event triggered by a notification.
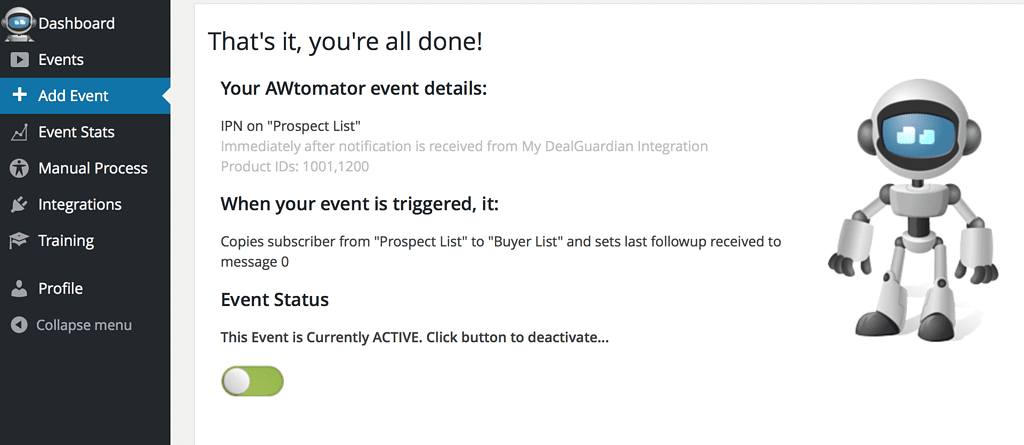
In the screenshot above, you can see that we’ve created an IPN Event that copies the subscriber from our prospect list to our buyer list whenever products 1001 or 1200 are ordered.
Find a DealGuardian Product ID by looking at the number that appears in the affiliate page link for that product. It will look something like: http://dealguardian.com/self_affiliates/XXXX
You can set up as many IPN Events as you need – all linked to your DealGuardian integration – and fire them selectively depending on the product ordered.
So, you could deliver a bonus “consumption” email sequence to buyers of one product, send upsell offers to buyers of another or just tag customers so you can broadcast to them in the future…
See the DealGuardian documentation for all available fields.
How will you use this? Leave your comments and questions below!
If you use AWeber, why not take a free trial of AWtomator and try this out for yourself!

