Payhip is a payment processor that makes it easy to sell digital downloads & memberships.
AWtomator allows you to automatically subscribe or add Campaigns Tags in AWeber as soon as someone completes a payment via PayHip.
And if you have multiple Payhip accounts, you can connect them all by repeating the instructions below for each Payhip account.
Here’s how.
Step 1: Setup an Integration in AWtomator
We need to get Payhip and AWtomator talking to each other, so the first thing we need to do is to hop over to AWtomator and create a new Integration, choosing Generic IPN as the Integration Type.
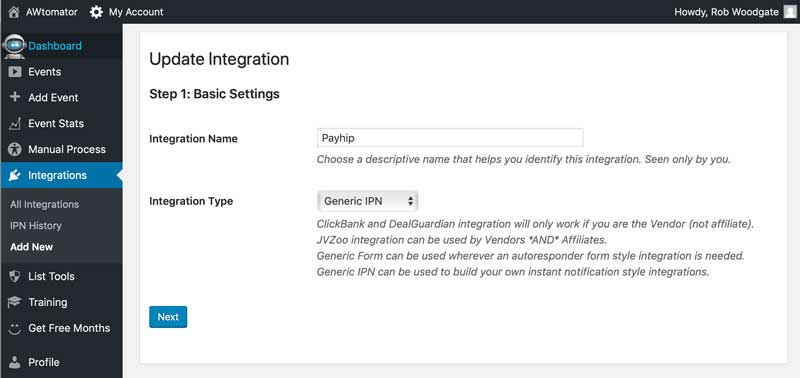
For Step 1: Basic Settings, set:
- Integration Name: This is for your internal use only (e.g. “Payhip”). If you have multiple Payhip accounts, then we recommend including the account name too (e.g. “Payhip – My Store”)
- Integration Type: Choose “Generic IPN“
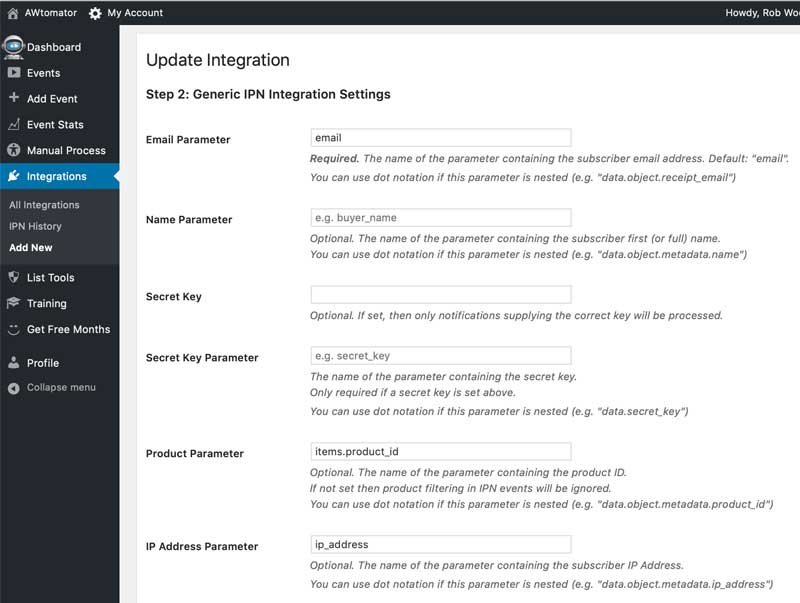
For Step 2: Settings, choose:
- Email parameter: email
- Product Parameter: items.product_id
- IP Address Parameter: ip_address
Note: Payhip doesn’t make its product ids obvious, so if you prefer, you can pass use the product name as the Product Parameter instead. To do this, simply replace the product parameter with: items.product_name
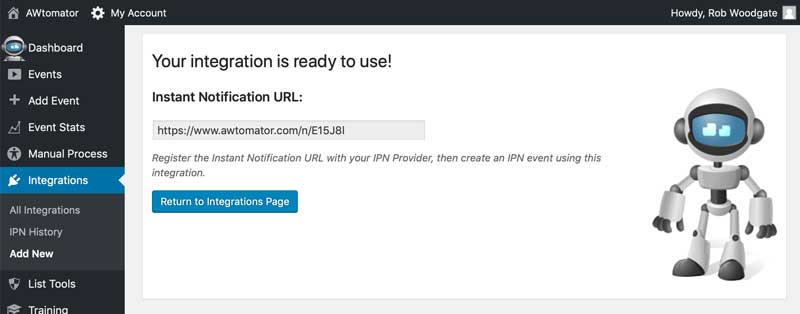
Finally, we copy the Instant Notification URL ready for…
Step 2: Create a webhook in Payhip
Next, we need to tell Payhip to contact AWtomator via the Instant Notification URL whenever an order is completed.
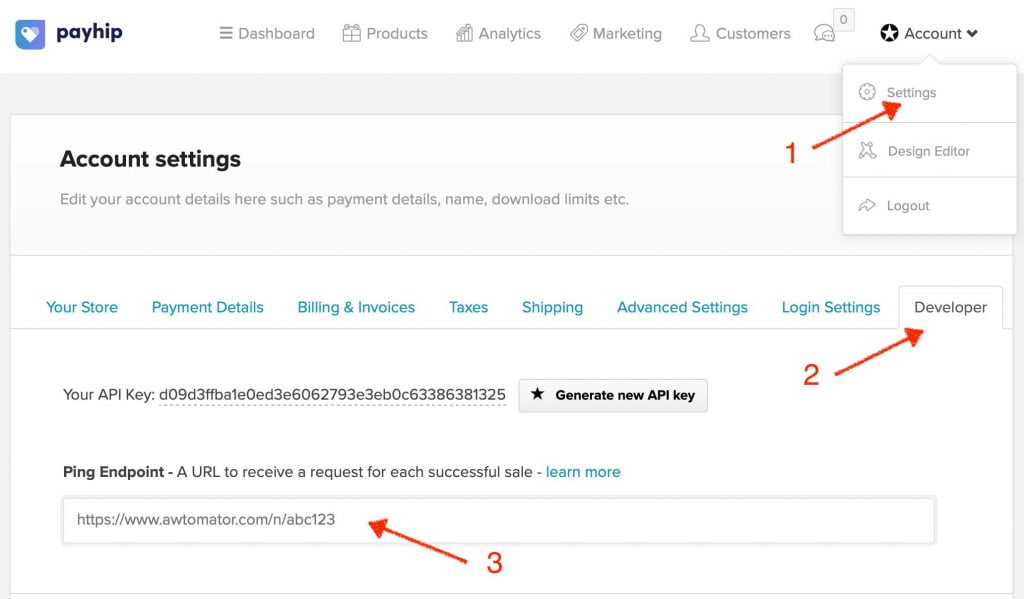
To do this, we simply go to: Payhip > Account > Settings > Developer, and paste the IPN URL into the Ping Endpoint box. Then save your change.
And that’s it!
Step 3: Tell AWtomator what you want to do when a sale is made
With the integration side of things setup, AWtomator will now get a notification any time an order is made via Payhip.
You’ll be able to see them appear in the IPN History log for the integration.
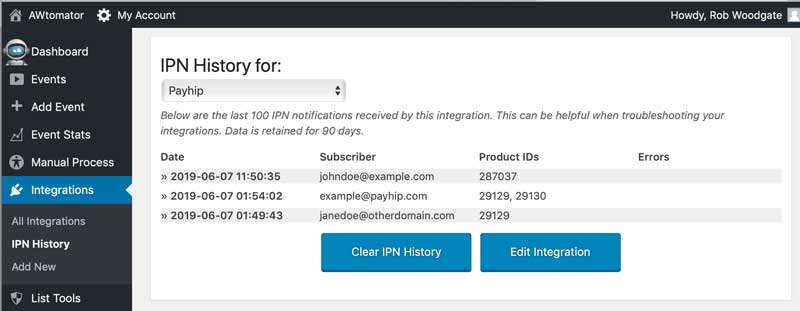
So now we need to tell AWtomator what to do when a notification comes in.
To do that, you simply set up an IPN Event in AWtomator, which is an event which is triggered by a notification.
You simply choose “Add Event” from the menu, and choose IPN Event as the event type. You can then use all the standard event features.
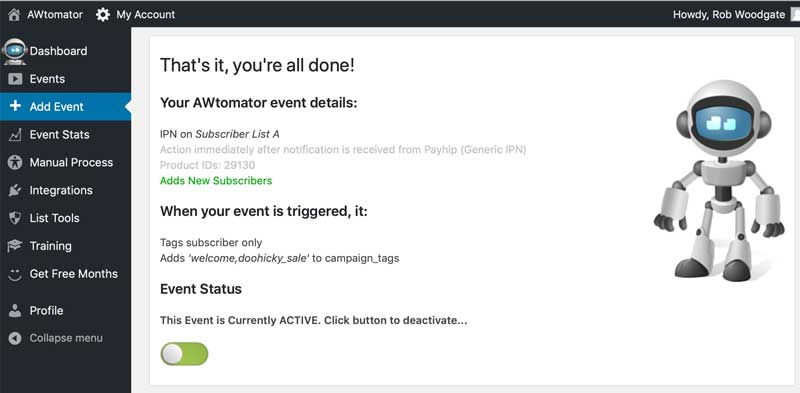
In the screenshot above, you can see that we’ve created an IPN Event that adds the subscriber to our list whenever someone orders product: 29130.
It also tags them with the AWeber Campaigns tags. welcome and doohicky_sale – which you can use to trigger an AWeber Campaign, or suppress one from starting.
You can also use the advanced options of the IPN Event to do things like:
- Add the subscriber to a Facebook Custom Audience
- Move/Copy the subscriber to another list
- Tagging a subscriber (e.g. to start a Campaign)
- Distribute a discount coupon
- Unsubscribing them from the list
- Adding/removing custom field tags or notes

